Sherry asks: We have some pretty dirty grout on a bathroom floor that we are unable to clean. We are trying to compare re-grouting with recoating the existing grout. We have read about easy-to-apply products that claim to seal and color existing grout. They sound a little too good to be true. Do you have any experience with these and have any recommendations?
Steve Bliss, of BuildingAdvisor.com, responds: Floor grout can get badly stained over the years on a bathroom floor, especially if it was not well sealed when the tiles were installed. Some of the newer grouts claim to be “stain-resistant,” without sealing, but in my experience, the only truly stain-resistant grout is epoxy grout.
Removing the grout and regrouting is not really a DIY job unless you have a steady hand, the right tools, and experience with grout. In my experience the best tool is an oscillating “ multi-tool” with either a carbide blade or special grout-removing blade. These are much less likely to damage the tile than a rotary blade on a RotoZip or other rotating tool.
Once you have removed most of the grout with the power tool, you can carefully scrape to the tile edges with a dull blade in a utility knife. The general rule-of-thumb is that you should remove at least 2/3 of the grout depth before regrouting.
This is a messy job with the risk of damage to the tile, but is a lot less costly than setting new tile. You can probably fine a tile contractor to take the job and complete the whole thing in one day.

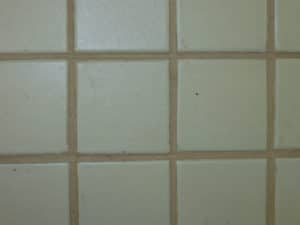
The grout sealers you mentioned are another option. These products are sold under a number of names including grout sealers, colorants, and stains. I have used a product called This Old Grout Color Seal with good results (see photo) although the application was a lot more tricky than described. I have heard similar reports about the other products on the market.
I used the product on 2×2 porcelain tiles with a matt finish, which the colorant tended to stick to. I think it would have been a lot easier on larger glazed tiles with larger grout joints. I ended up masking the joints in order to apply a thick enough coat to completely cover the dark, stained joints.
This was a lot of work, but the results look great two years later. It was certainly easier than removing the rock-hard grout from this many narrow joints.
A few tips:
- Read and follow the instructions of the sealer manufacturer, especially the prep work required for a good bond. You may be able to bleach out dark stains with a paste of baking soda and water. If that doesn’t work, try white vinegar and water or oxygenated bleach and water.
- Clean the grout as best you can before applying the colorant. If a grout sealer was used, you will need to remove the sealer with a suitable cleanser. Silicone sealers, which I do not recommend, are the most difficult to remove. One commercial product I have used is the TileLab Heavy-Duty Stripper and Cleaner from Custom Building Products.
- Test the new sealer on a tile and joint in an inconspicuous area, before committing to the whole floor. You may find that two coats are necessary to cover dark stains in the grout. You may also find that the sealer sticks to the tile surface more than advertised.
- The applied colors of the sealer don’t necessarily match the colors on the charts. You can expect more muted, grayish colors than newer pigmented grouts.
- Keep some extra sealant on hand in case some areas need touching up later.
There are many grout colorants on the market. Most are described as “water-based epoxy” formulas. Products offered by major suppliers of tile products include:
Aqua Mix Grout Colorant, Custom Building Products
Grout Colorant, TEC
Polyblend Grout Renew, Custom Building Products
UltraCare Grout Refresh, Mapei
Leave a Reply