Randy asks: What is the best way to drill ceramic tile for installing grab bars, shower rods, and other hardware? I didn’t have much luck with a carbide bit and even tried a hammer drill.
Steve Bliss, of BuildingAdvisor.com, responds: A carbide bit will work fine on soft wall tile, but floor tile and most wall tile used today are harder and require a diamond bit for easy drilling. Porcelain tile definitely require a diamond bit. Avoid hammer drills altogether as you risk cracking the tiles.
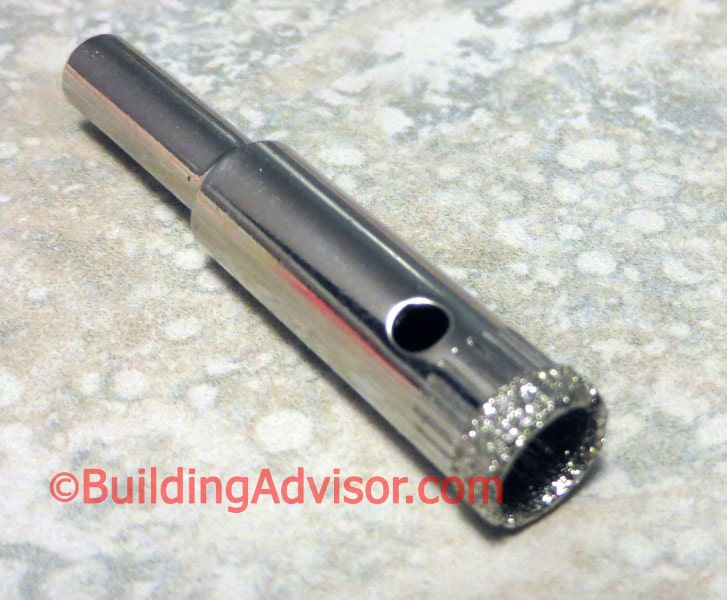 The best choice is a diamond core bit, which is hollow and comes in sizes from 1/8” to whatever size you need. Drill the hole larger than the screw diameter so the screw does not press against the tile.
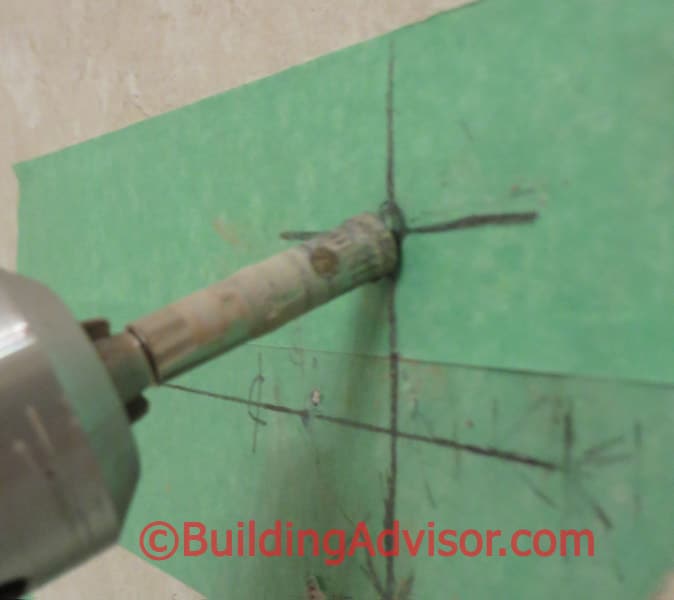
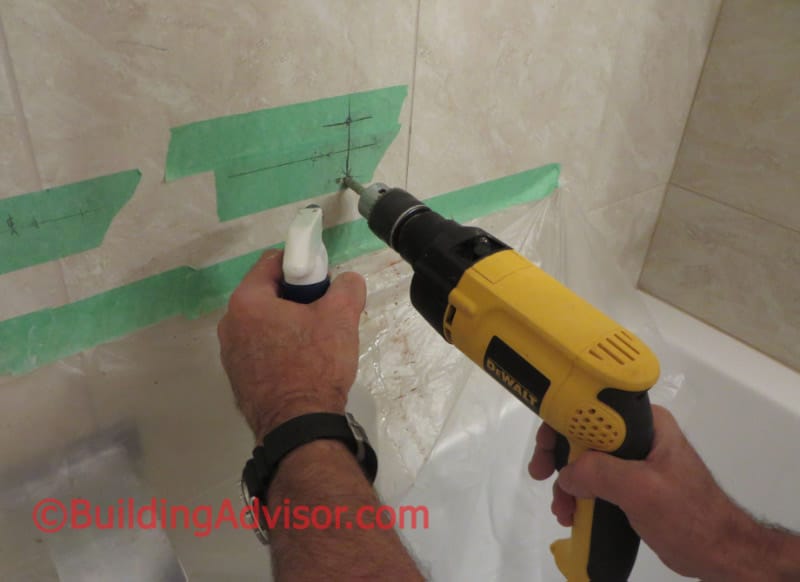
To start the hole, hold the drill firmly at about a 45 degrees, starting the drill slowly and holding it firmly to keep it in place. Drilling through tape can help you keep the drill in place. Once the bit has cut a little groove, gradually shift the drill to horizontal and run the drill at full speed, spraying both the drill and hole frequently with water.
With the drill straightened out, you’ll fly through the material pretty fast. If you plan to reuse the bit, it’s best to clean it out after each hole. Some core bits have holes or slots to help with this process. Banging a nail or nail set through the hollow core can also help remove tile debris that builds up.
I’ve had good luck with bargain bits purchased on the internet, but don’t expect them to last for too many jobs.
Richard Robertson says
Best Way to Drill Through Stone?
Hello and thanks for your helpful info. I want to drill a hole, maybe 3/4″ or less and 2-1/2″ long, into a loose stone, probably under four inches thick and one foot in diameter. I am told than an SDS rotary hammer drill with a carbide tip is the way to drill a hole into rock, but I have no idea how this device works and with a name like “rotary hammer” it makes me wonder whether I could safely and effectively use it on a small stone in a vise (as opposed to a mammoth, immobile rock). Does this device work like a jackhammer or is it primarily rotary motion?
buildingadvisor says
Soft rock like sandstone can be drilled pretty easily with a carbide bit and an ordinary drill. Hard rock would require a hammer drill. An SDS hammer drill has a more powerful hammering action and requires special SDS bits. SDS models are typically more powerful, higher-torque drills that might be overkill for your one hole.
Hammer drills are easy to use as the motion is mostly rotary combined with small, rapid, impacts, that make the drilling go much faster in masonry materials. It’s not at all like using a jack hammer. However, with the larger high-torque drills, if the bit binds on a piece of rebar, or very hard rock such as quartz, the drill can jerk out our your hands and hurt you if you are not careful. Starting with a small diameter pilot hole and then working up to larger bits can make the process smoother.
Start slow and work up to a moderate speed of 750 rpm or so. Using lower drill speeds while applying adequate pressure is usually the most effective approach. You don’t want the bit just spinning in the hole as this will heat up the bit and wear down the cutting edge. It’s best to pull the drill out every 1-2 inches to clean out the debris.
If you don’t want to buy or rent a hammer drill, another option is diamond core bit used in a standard drill. These are good for stone as well as well as other very hard materials such as glass, porcelain, and other hard ceramic tiles. Some diamond bits are surprisingly affordable. Don’t expect these to last forever, but they will often get the job done quickly and cheaply. I’ve used these mainly to drill small diameter holes in ceramic tile, but they should work for a 3/4-inch hole as well.
Look for a bit with a slotted side, which helps when trying to clean the debris out of the core. You need to clear the core periodically to continue drilling. Start slowly, bracing the drill to keep it from sliding around. Once a hole is started speed up to a moderate speed and spray water into the hole throughout the process to cool the bit. An ordinary plastic spray bottle works fine.
I would probably try a diamond bit first, and if you are not happy with the results, move up to an hammer drill. Whatever approach you take, make sure the stone is solidly held. I would probably brace it on the ground if using a hammer drill. In a vice, the diamond-core drill might be more effective.